Building your own DIY floating picture frame is a pretty dang easy project. If you’re new to woodworking, it’s a great starter project. If you have some experience in the shop, it’s a super quick/fun build to take on.
In this post, I’ll walk you through how to build your own DIY floating picture frame in a few easy-to-follow steps as well as include a few additional tips in case you wish to paint your frame a custom color.
Let’s dive in!
Some of our posts contain affiliate links. We often share links to the tools & products used in our home improvement projects and if you purchase one of these items using our link, we may earn a small commission (at no additional cost to you).
Materials
Step 1: Measure Your Art
Measure the length and width of your art. Our painting is roughly 24″ wide by 18″ tall.
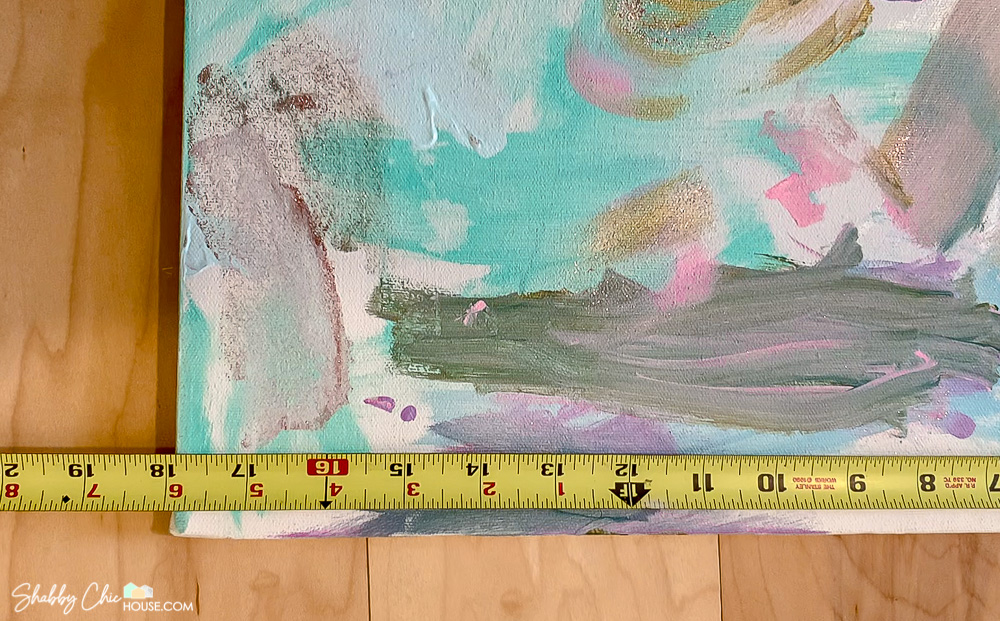
Since this is a floating frame, we’ll want roughly a 1/8 inch gap between our frame and the painting.
Account for the 1/8″ gap on both sides of the painting.
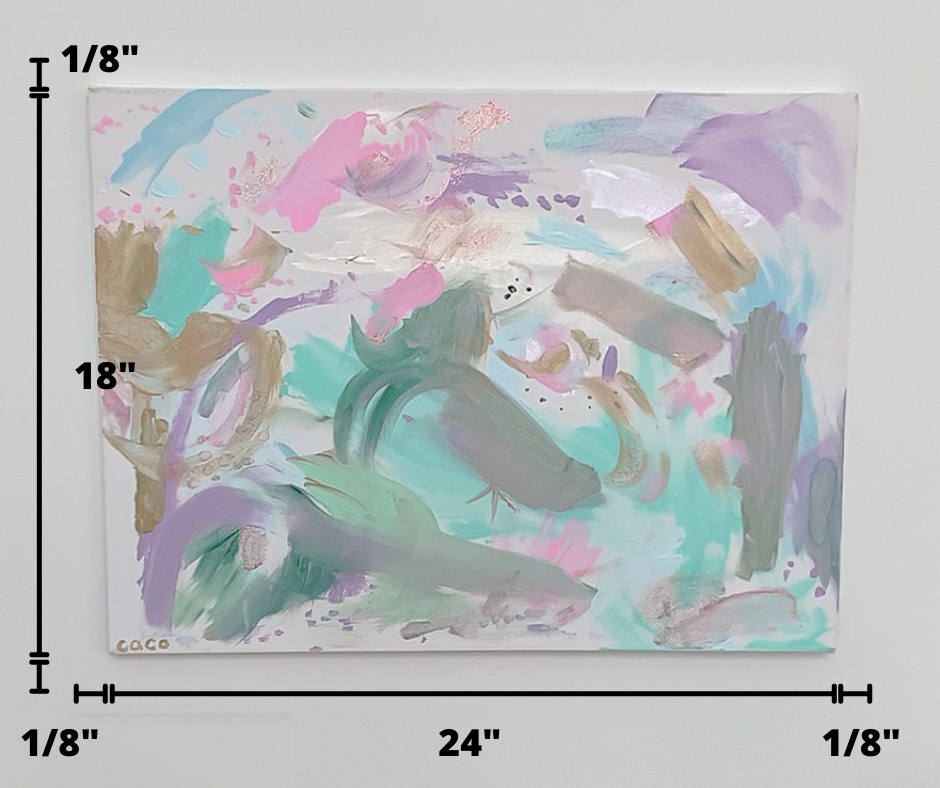
Measurements & Math
24″ + 1/8 + 1/8 = 24 1/4″
24″ + 1/8 + 1/8 = 24 1/4″
18″ + 1/8 + 1/8 = 18 1/4″
18″ + 1/8 + 1/8 = 18 1/4″
TOTAL LENGTH NEEDED FOR OUR PAINTING: 85″ or 7.08′
For our project, we used what is commonly known as a 1″ x 2″ furring strip. Similar to the 2×4, those are not the actual measurements. This piece of wood actually measures .75″ x 1.5″.
With our measurements above being just over 7′, we purchased 8′ of material.
Step 2: Cut Your Wood
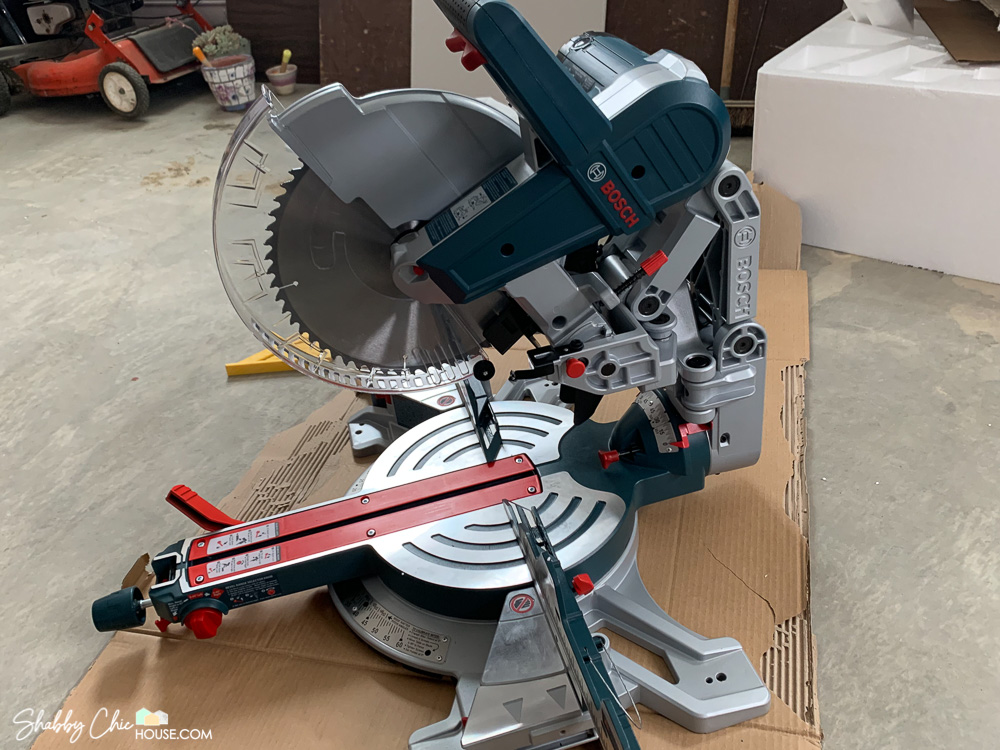
A good miter saw is the preferred tool to make the most accurate 45-degree crosscuts. However, if you don’t have access to a miter saw and are looking for an inexpensive alternative you can also use a miter box.
If you are in the market for a miter saw, check out Bosch’s patented axial glide miter saw. I just picked up the 12″ version last year and the hinged arm (official name – axial glide) allows you to set the saw again the wall in your shop. This technology is a game-changer as most other miter saws need 12-18″ of clearance from the wall!
Needless to say, this monster is the envy of a few woodworkers in my family.
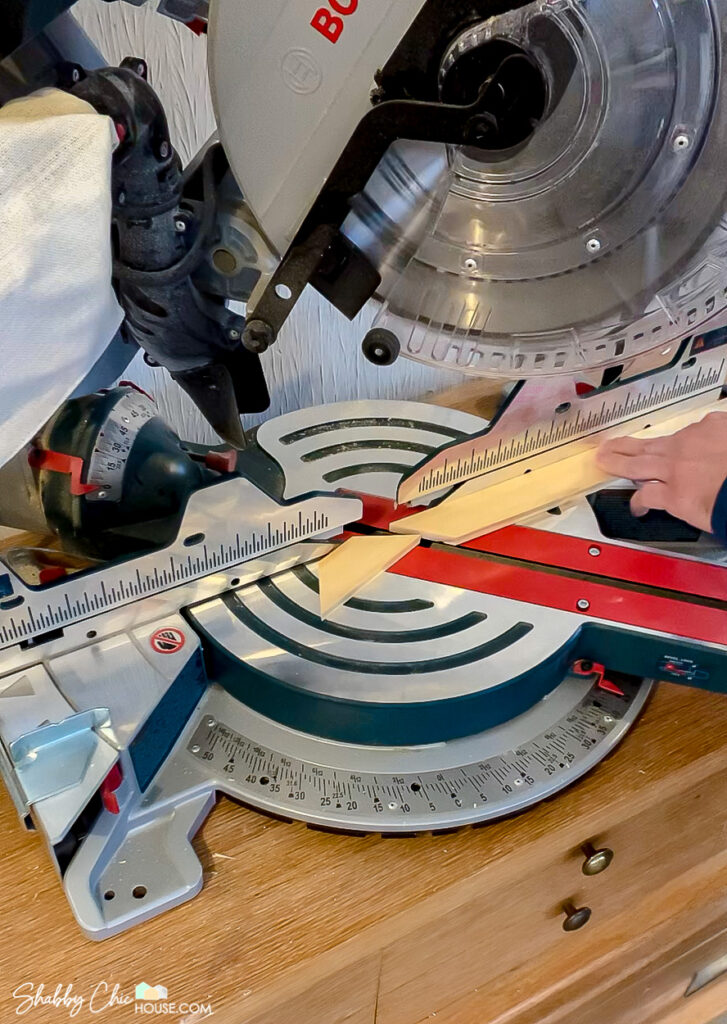
Ok, so let go! Set your miter saw to make a 45-degree crosscut and cut your 1″ x 2″ per the measurements you took above.
After you’ve cut the four 1×2’s pieces that will make up your frame, we’ll want to cut four corner brackets that will allow us to secure your canvas in the frame and create the “floating” look.
We used a 1/4″ thick board. These corner braces will sit flush with the back of the frame.
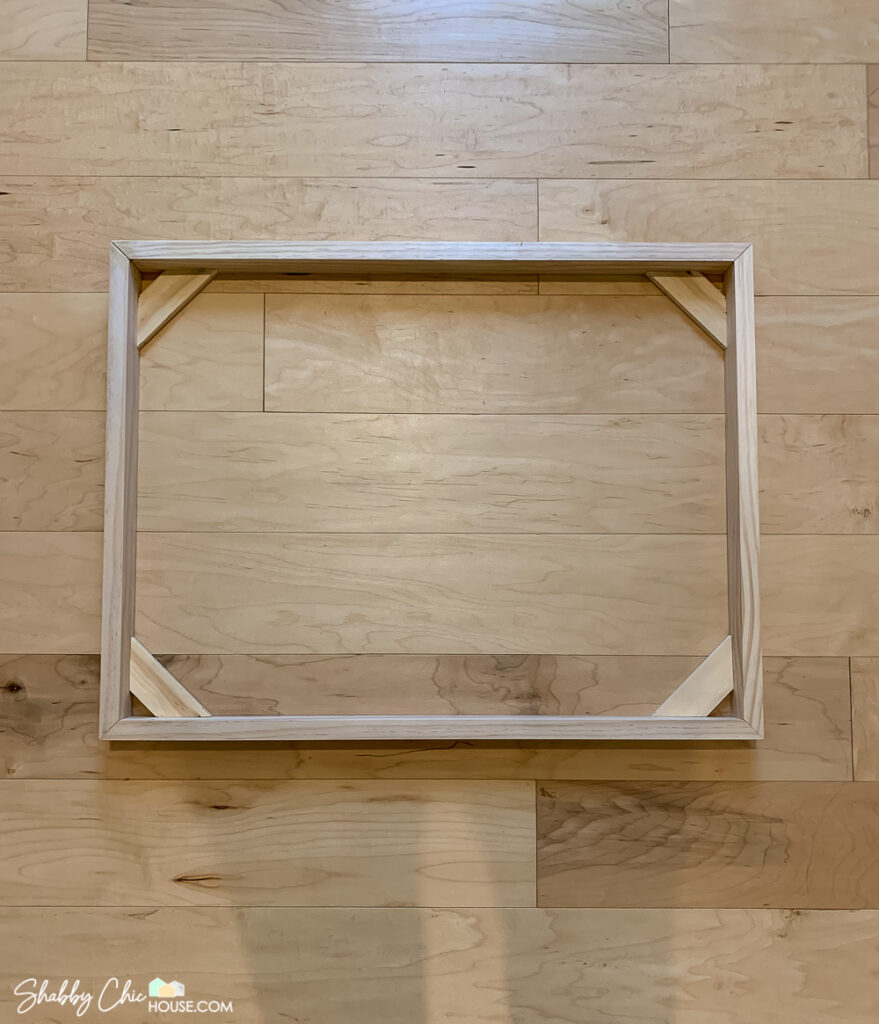
There’s no need to take make an exact measurement on these. Just make try to keep them around 1″ or so out from the corner of the frame. Also, once you cut your first bracket you can use it as a template for your next three.
Step 3: Glue, Clamp & Nail
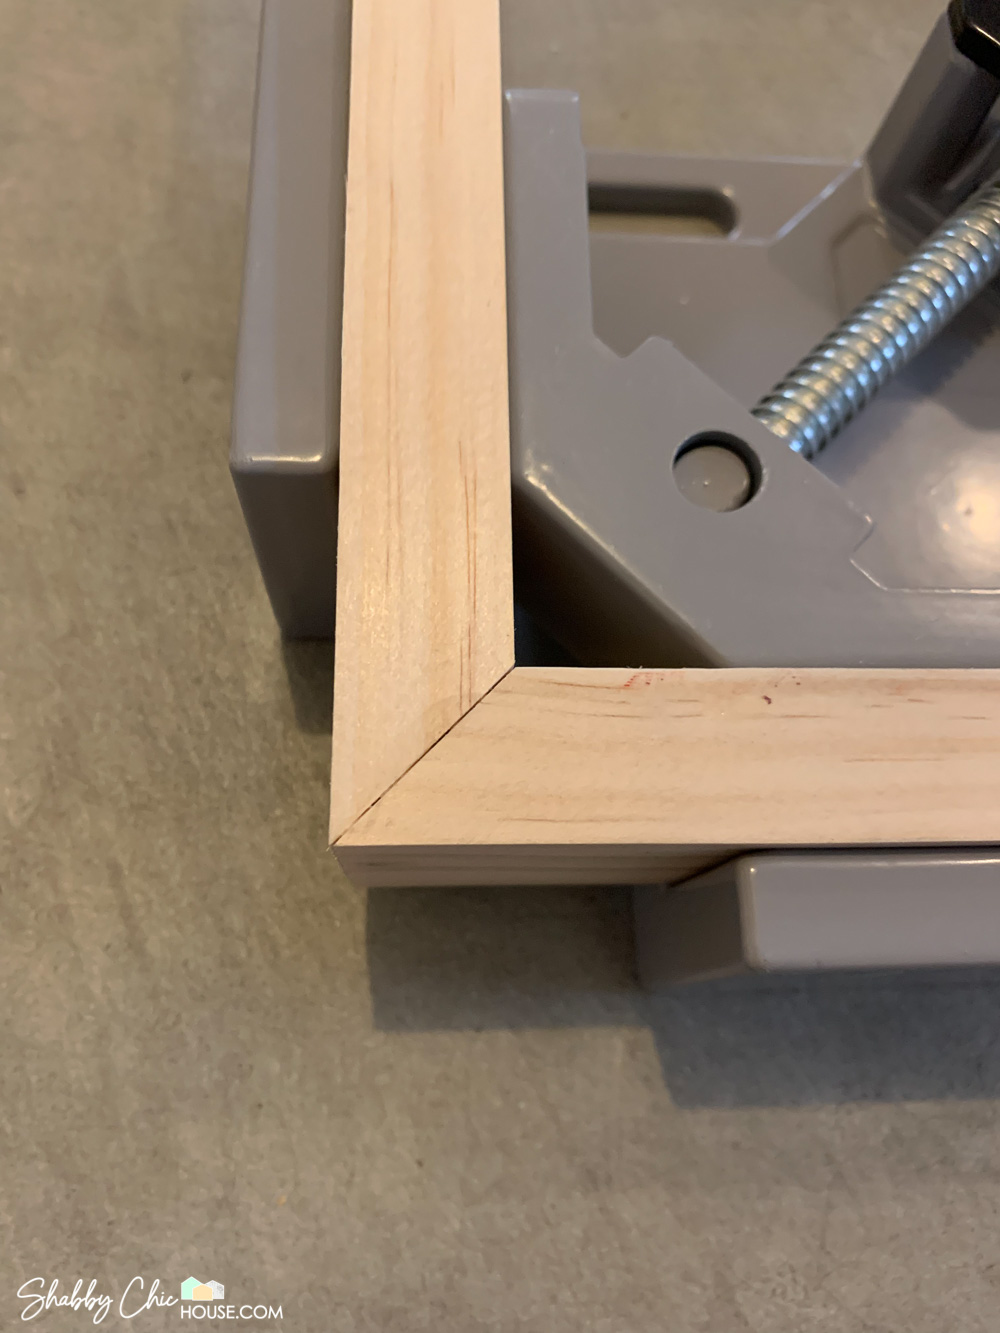
Next dry fit your frame together. How does it fit? Well? If so, you’re ready to Glue, Clamp, and Nail.
Wood glue is the preferred glue for this type of project. Titlebond is our go-to!
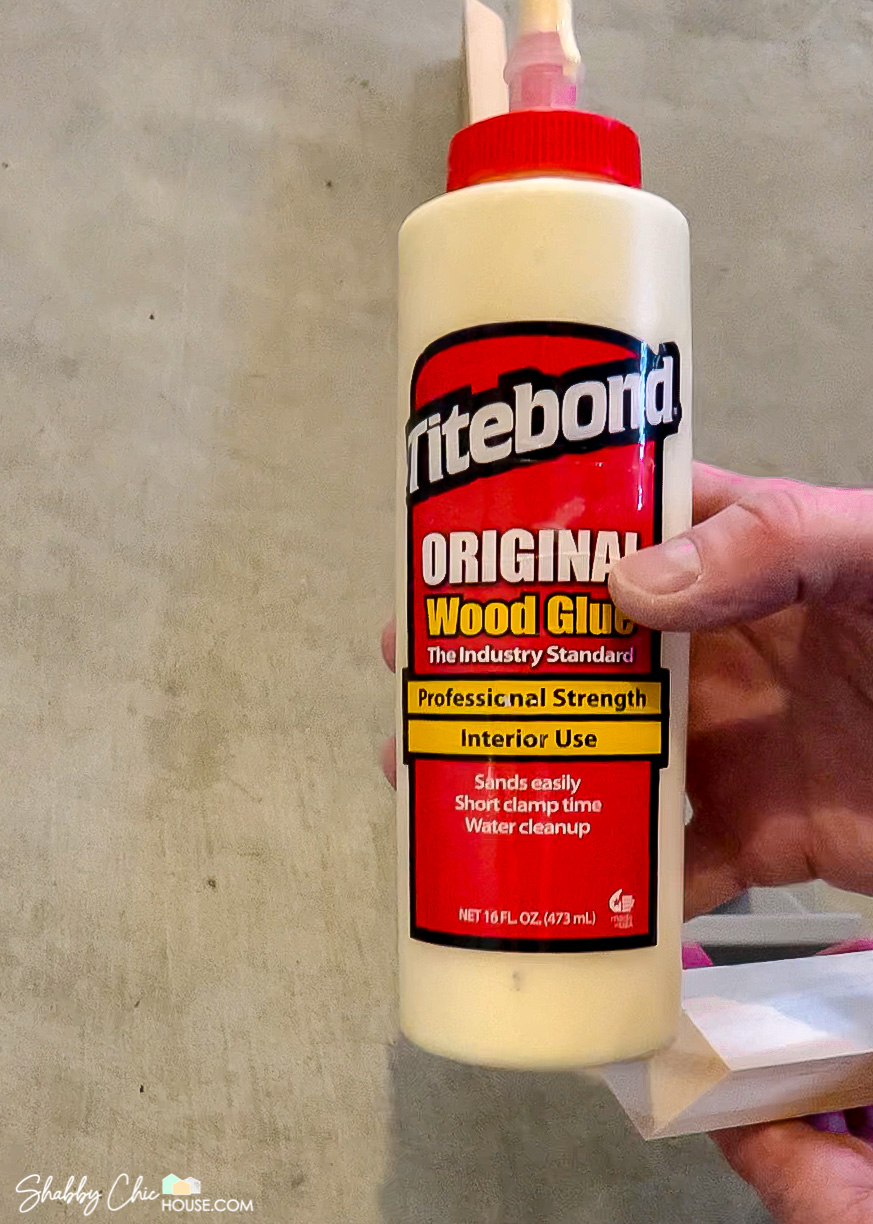
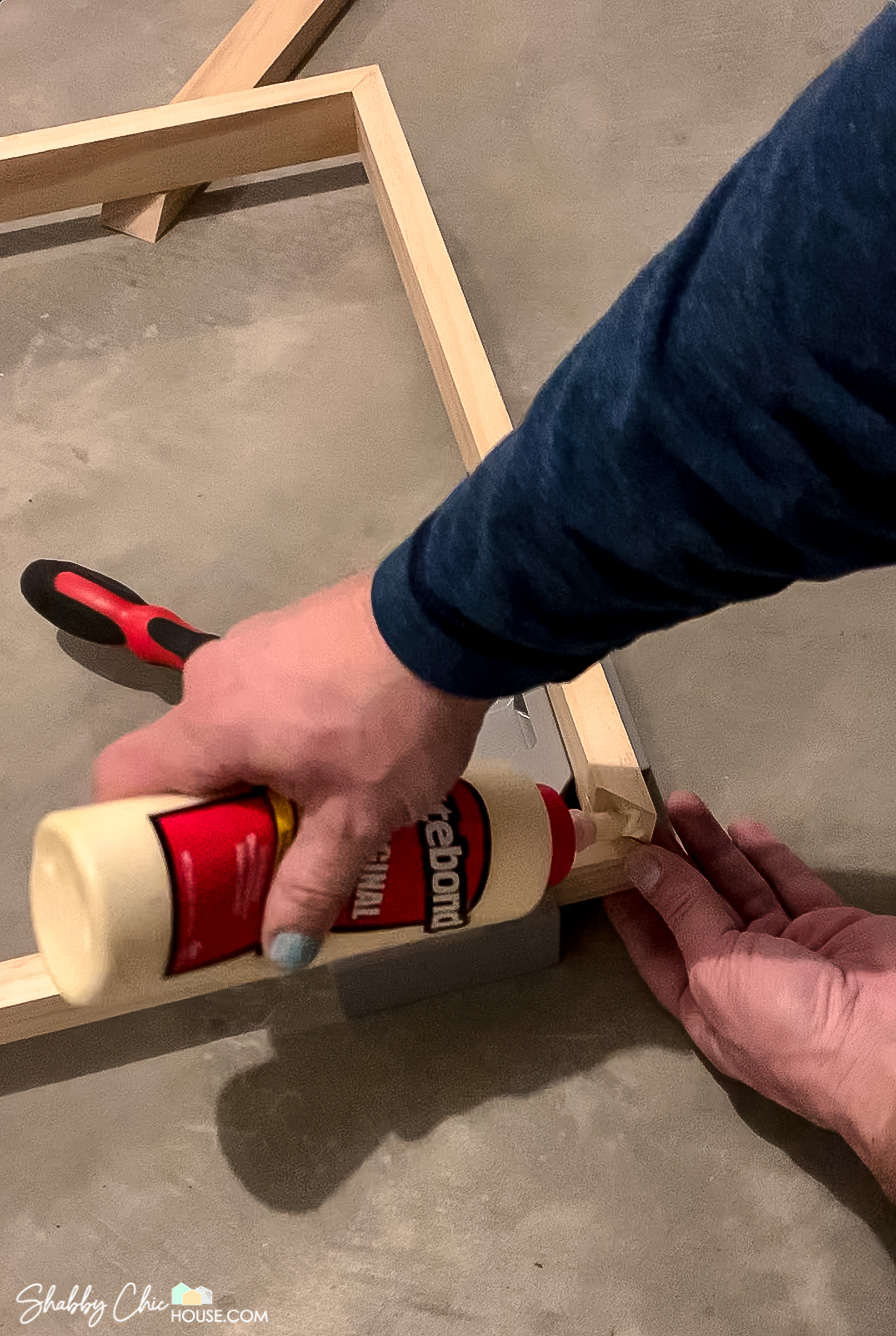
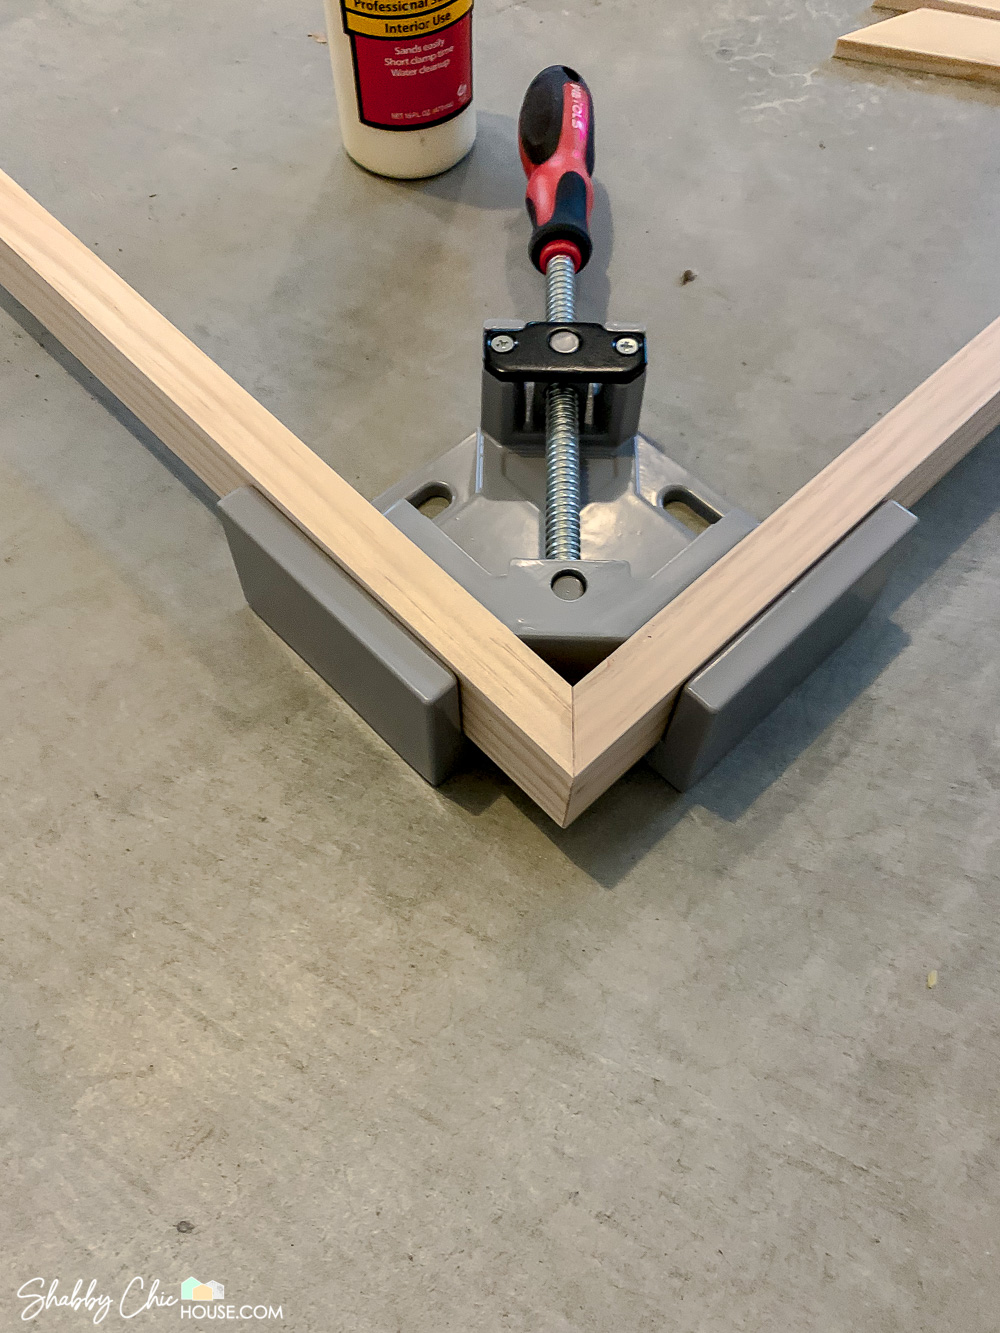
Place a small amount of glue in your corners and then secure with a clamp.
I picked up these inexpensive 90-degree clamps not too long back which are awesome for building any sort of box-like structure (picture frame, cabinets, bench, etc.).
Once clamped, permanently secure your frame with a few 1″-1.25″ nails in each corner. We have this Metabo compressor and 18 gauge brad nailer which we use for all our woodworking, crown molding and wainscoting projects (Check out our recent wainscoting DIY tutorial).
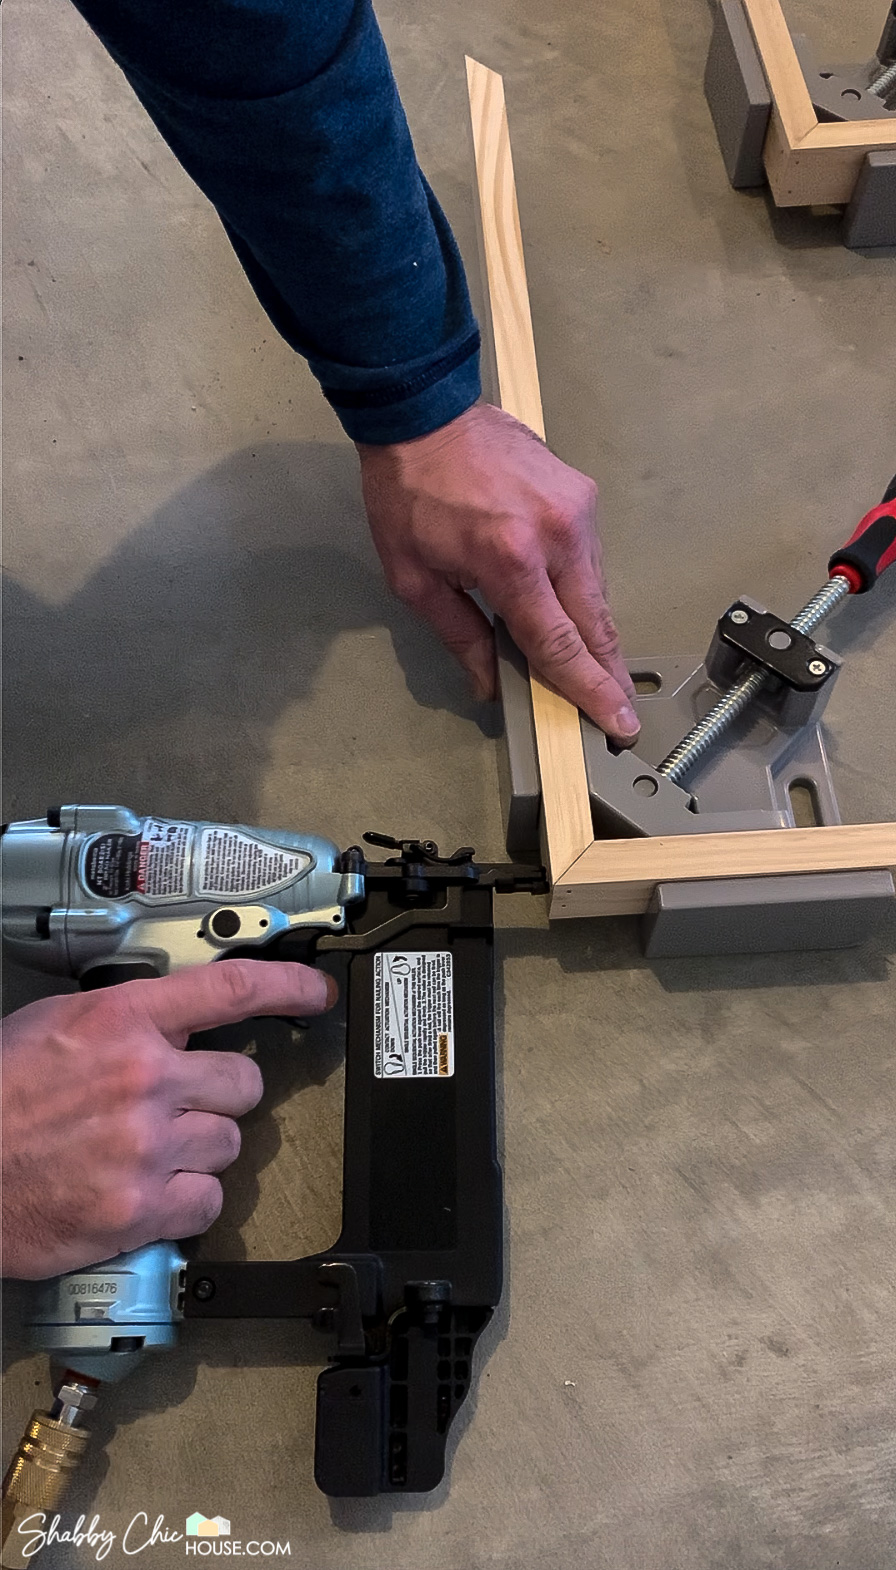
CAUTION: When using a nail gun, make sure to keep your hands clear of the wood that you are nailing. When nailing a thinner piece of wood like this, the nails can occasionally be redirected and unexpectedly pop out the side of the wood.
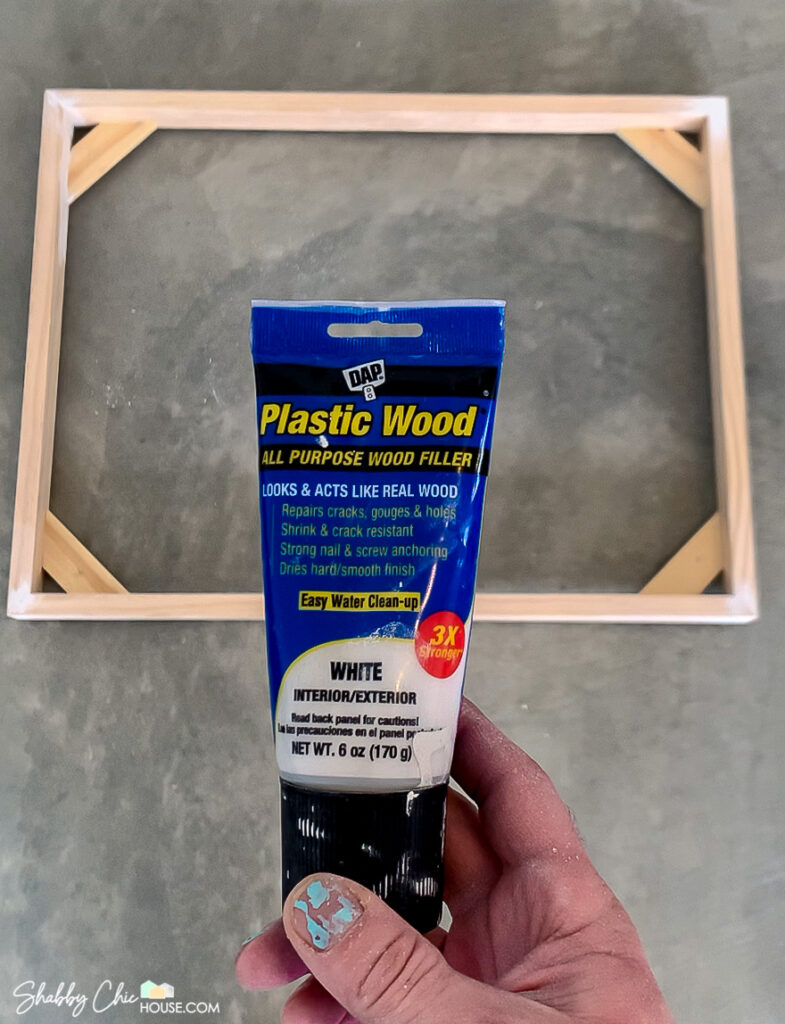
Step 4 (Optional): Fill Nail Holes
Brad nails are pretty small and would likely go unnoticed. However, if you’re a perfectionist and don’t mind spending an extra 2-3 minutes you can fill these holes with a wood filler.
If you don’t plan on painting your frame make sure to use a natural colored wood filler.
If you plan on painting your frame you could also consider filling the corners/miters to create a frame with a seamless look.
Fill your nail holes/corners and allow 3-4 hours for the wood filler to dry. Once dry, give a light sand.
Step 5 (Optional): Paint Your Frame
If you want to go with the natural wood look, you can skip this step. If you want to spice things up, you can add a bit of color or even stain your frame.
With these types of floating frames natural wood, black and white seem to be the most common choices.
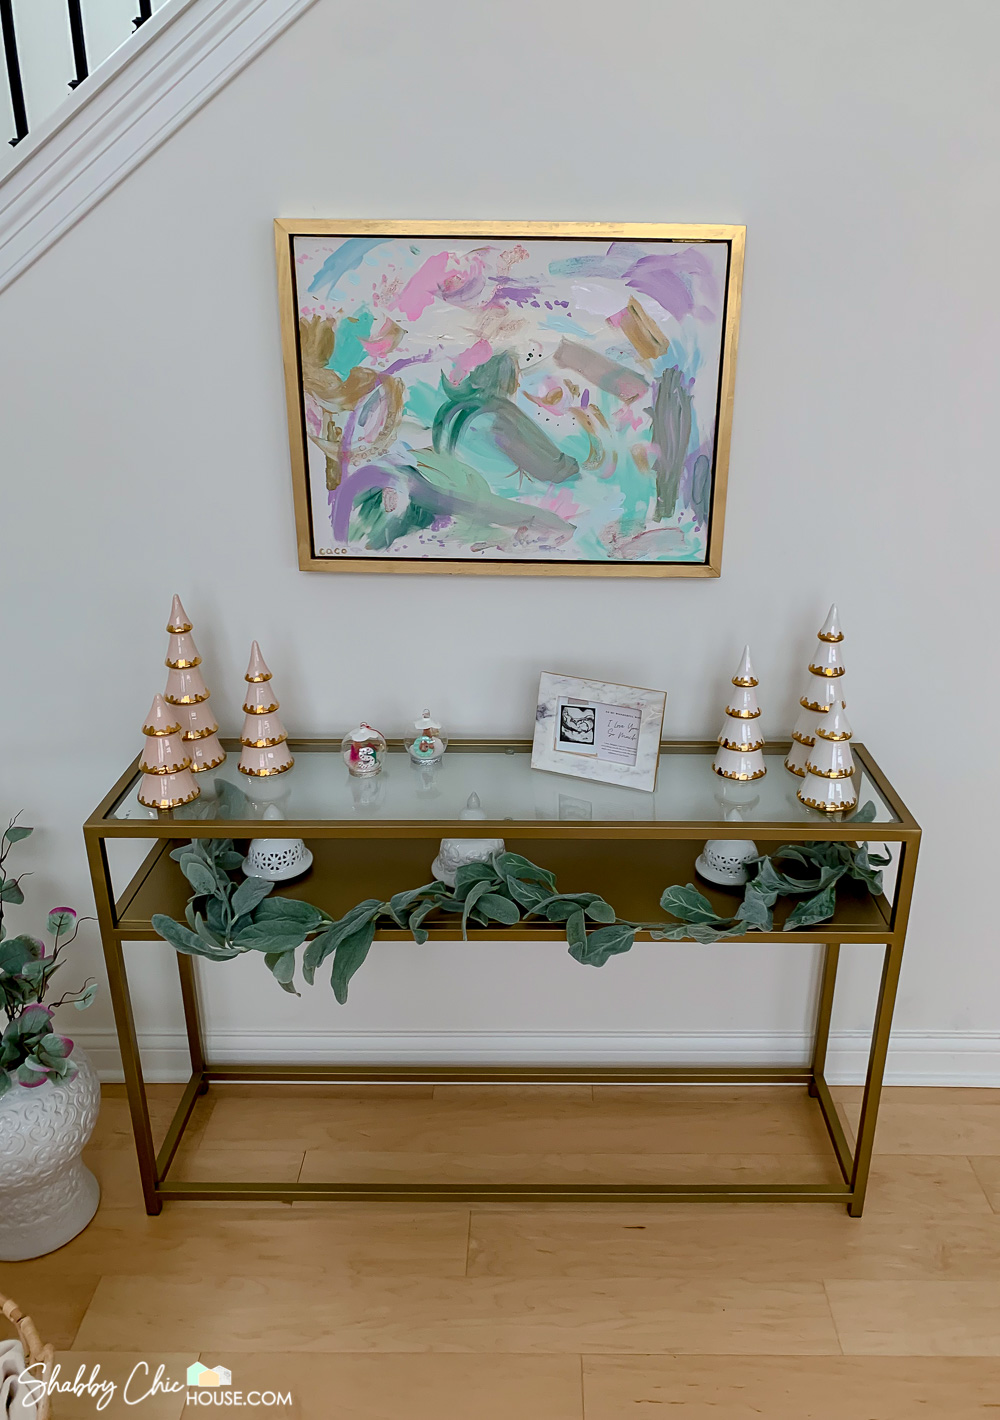
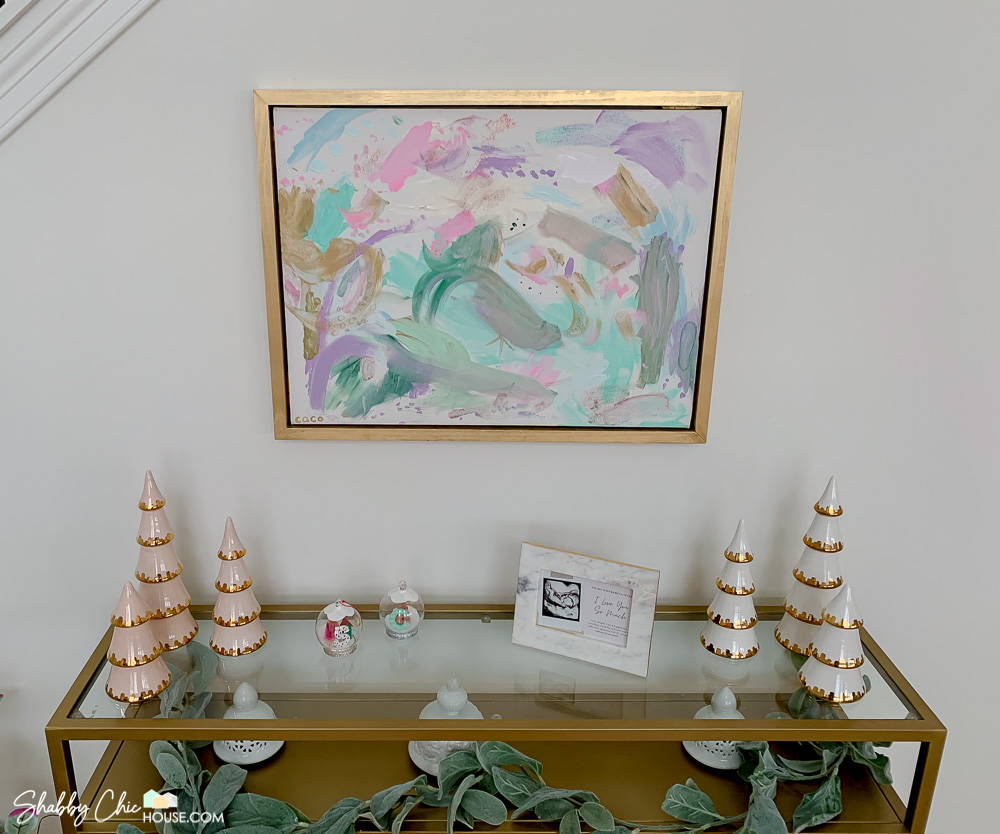
For our project, we decided to use Rustoleum’s Gold Metalic Finish spray paint to match a few other home decor pieces we painted the same color.
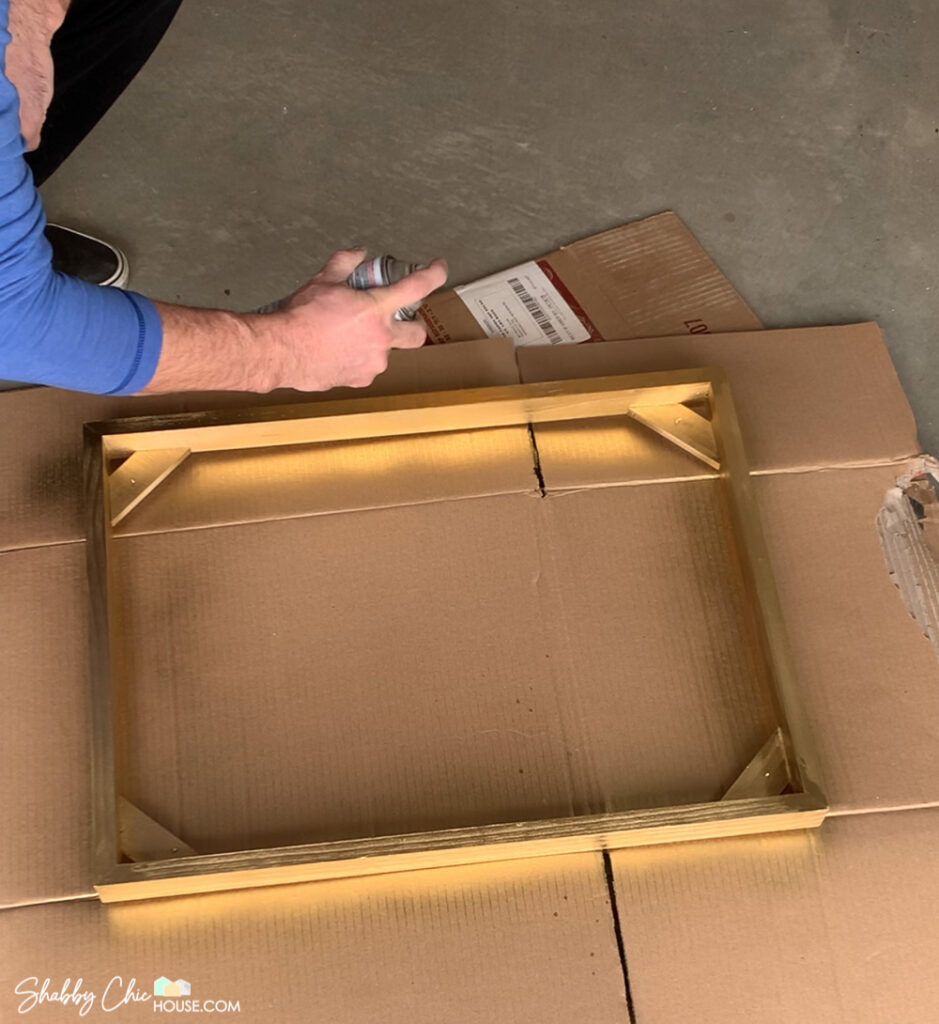
However, if you wanted, you could also paint with some regular ole paint and brush.
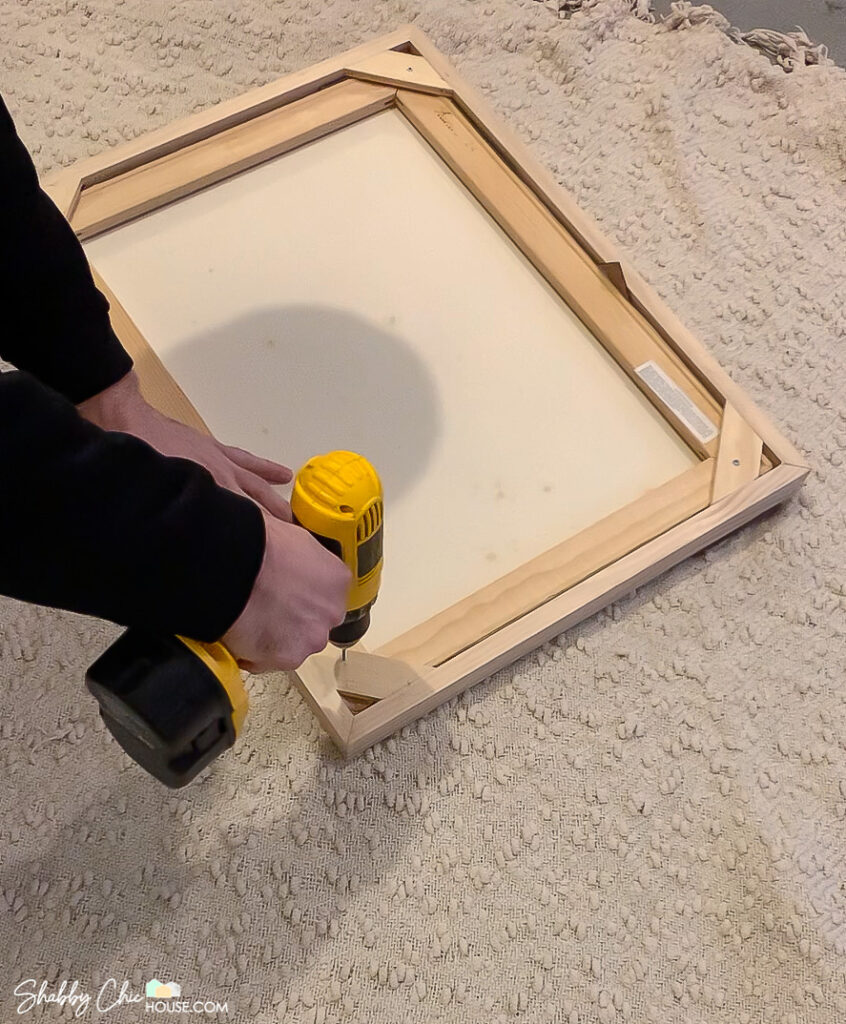
Step 6: Installing Your Art Into the Frame
To ensure that you have an equal gap between your canvas and frame use cardboard. Your standard cardboard box is about 1/8″ thick and is the perfect size spacer.
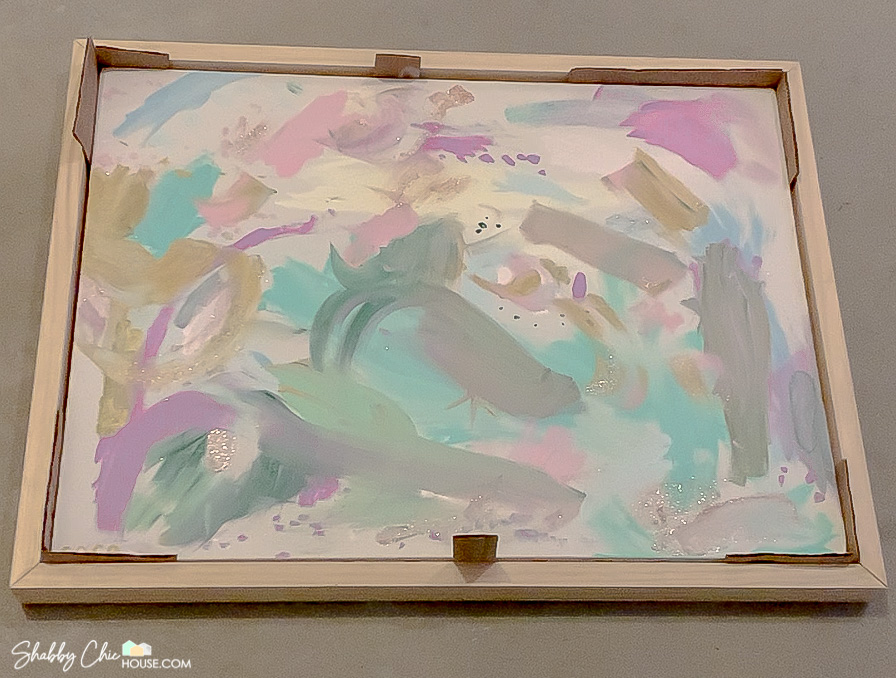
Once you have your canvas perfect spaced in the frame flip it over secure with a nail or a screw. We drilled pilot holes and used screws, so the canvas could easily be removed from the frame in the future.
Step 7: Hang & Enjoy!
Check out both the natural wood frame and metallic gold finishes below. Which one is your favorite?
Natural Wood

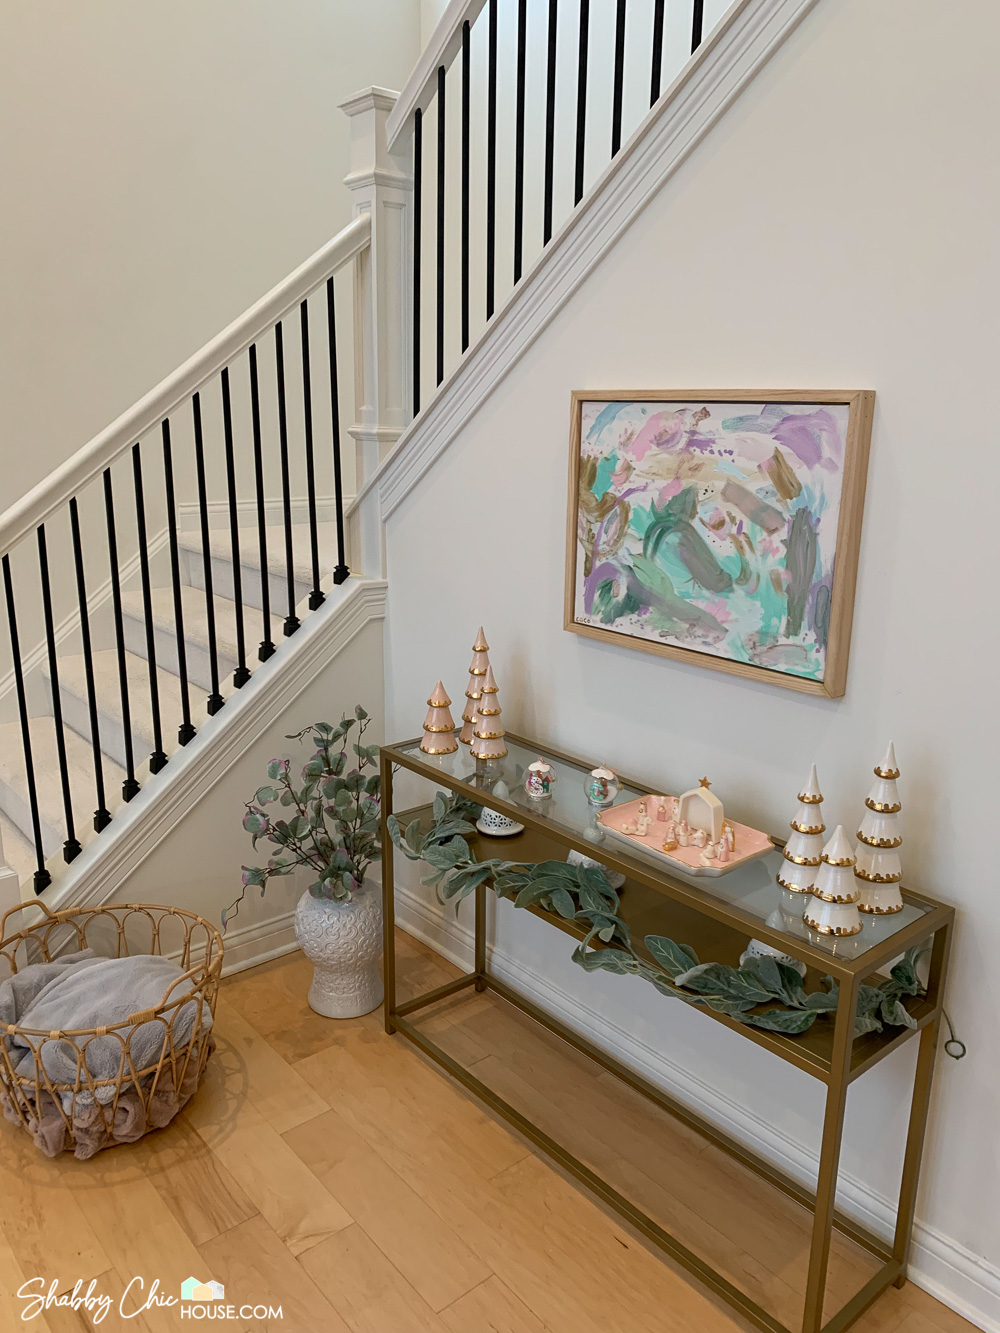
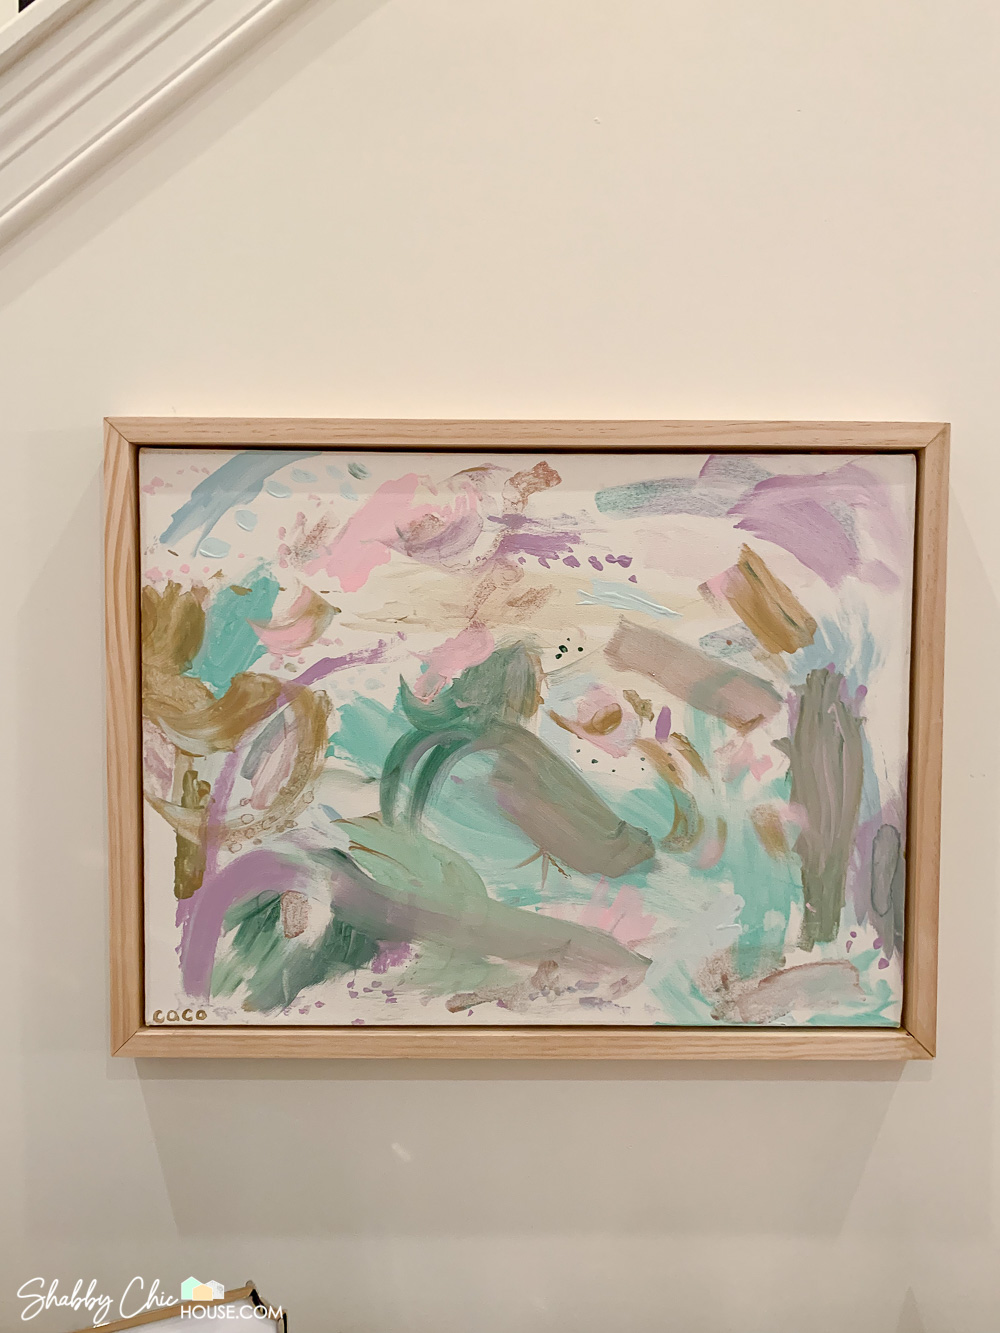
Metallic Gold